We have created a plugin for all WordPress users to connect thier blogs with the CheetahO API. Install our WordPress image compression and optimization plugin – stop worrying about image optimization and slow-loading pages.
Download the WordPress images optimization plugin and check the tutorial below how to install it.
Image optimizer plugin for WordPress installation
- Go to your website plugins page.
- Click the button to “Add new” plugin.
- In the search field type “CheetahO”.
- Choose the “CheetahO Image Optimizer” to install.
- Activate it.
- To use this plugin you need a CheetahO API key. Register in the CheetahO panel, then get your API key here: https://app.cheetaho.com/api-credentials .
- Go back to your website.
- Open the CheetahO plugin settings (Settings > CheetahO).
- Paste your API key.
- Update settings (see how the CheetahO settings page looks in the attached image)
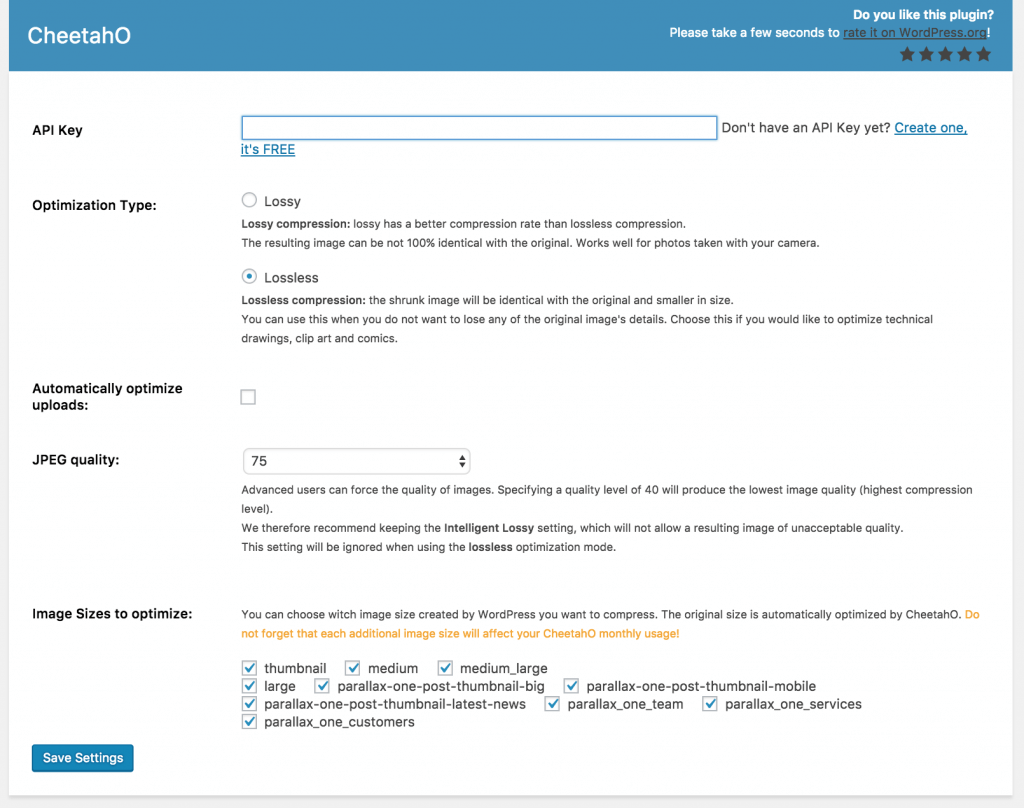
Add the API key to the plugin settings page in the field “API key”. See in screenshot:
You can also select how the plugin will work in your WordPress.
- You can change the optimisation type by choosing “lossy” or “lossless”.
- Automatically optimize uploads – enables image optimization on-the-fly when you upload them.
- JPEG quality – allows you to choose the image optimization quality.
- Image Sizes to optimize – this option lets you choose which image type you want to optimize.

CheetahO also allow users to resize images during image optimization process. Update “Resize my full size images” parameters to desired image size in pixels and try to optimize images.
Do not forget to update CloudFlare credentials if you are using CloudFlare. CheetahO will update CloudFlare cache when image will be optimized.
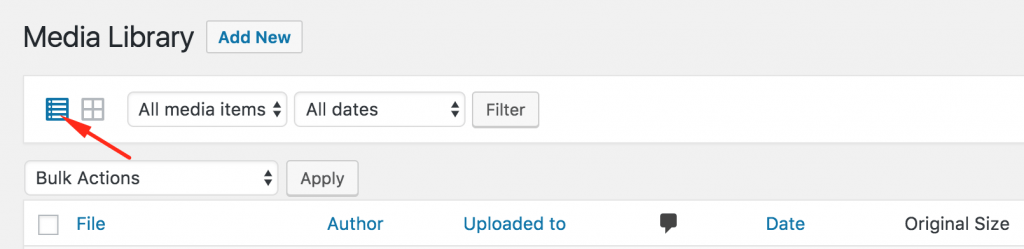
WordPress image optimization plugin in the media library
You can compress images from the media library. To see the CheetahO image optimizer options, switch the image list to the classic view, like in the image below:
Choose the image you want to optimize and click on the button “Optimize this image”:
When the image is optimized, you will see the optimization statistic instead of the button “Optimize This Image”. Want to optimize more than one image?
- Select more than one.
- In the field “Bulk actions” choose “Optimize all with CheetahO”.
- Click the button “Apply”
Bulk image optimization (compression) for WordPress
The CheetahO WordPress plugin can easily optimize a lot of images with the click of just one button. If you want to do this, you need:
- Go to menu “Media > Bulk CheetahO”
- Click the button to start optimizing images.
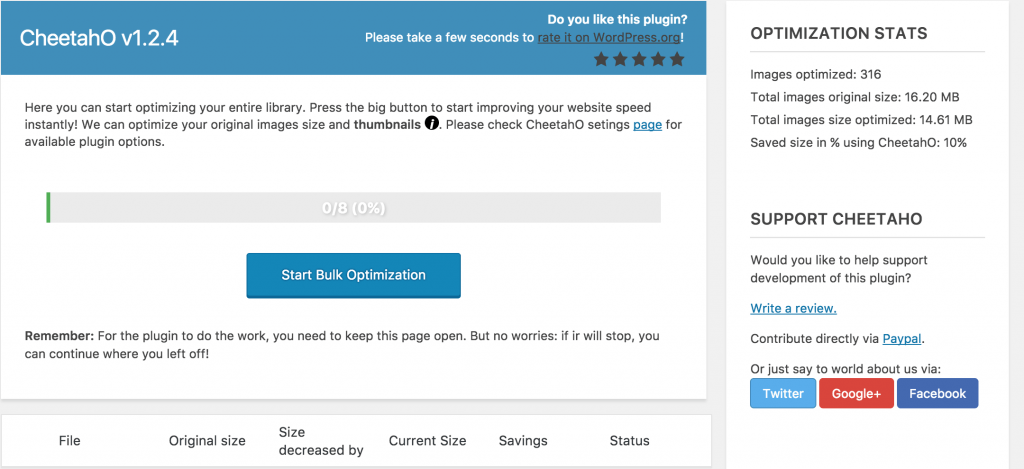
Remember: Do not close the window or go to another page while the system optimizes the images.
Image backups
The CheetahO WordPress image compression and optimization plugin allows you to make backups of images before you optimize them. You can disable this feature in the plugin settings page, but we highly recommend you use backups. If the system cannot optimize images or there’s an error, you can always restore the original images from backups (by clicking the “Reset” button near the image). When all the images are optimized and you are happy with the results, you can empty the backup folder by clicking just one button in the CheetahO plugin settings page (“Empty backups”).
Will the WordPress plugin work on a localhost?
Unfortunately, the CheetahO image optimization/resize plugin only works with publicly accessible websites. If your site is locally hosted, this means that it is not publicly accessible. Therefore CheetahO will not be able to download the images to optimize them.